Showing posts with label Zinsser BIN Primer. Show all posts

Friday, May 25, 2012

Prep & Paint Wicker

My front porch wicker chair has been in need of a little TLC. Since wicker is a day or two project, I decided to wait until spring to give it the ultimate overhaul. Prepping this wicker chair is key and I will give it extra elbow grease. I like to brush off the old paint with a medium wire brush, shake it out and then add 1/4 cup of bleach to a healthy bucket of water - with a nylon brush, I dip into the bucket and scrub down my chair, hose and then allow it to fully dry. Since wicker is wood, it tends to swell when wet so I do highly recommend that you allow soaked chair to fully dry a good 24 hours, depending on weather - it may even take 48 hours. This is a key step because you do not want to apply your primer to wet wicker. So, let's tackle this two/three day project and add that perfect dash of color with Painter's Touch 2X !


Project Materials:
*Wicker Piece
*Painter's Touch 2x COLOR TO BE DETERMINED - 2 cans
*Medium Wire Brush
*Medium Nylon Brush
*Bucket
*1/4 cup of bleach
*Drop Cloth

Project Steps:
*Using your medium wire brush, brush off loose debris & old paint
*Mix together 1/4 of bleach with a half a bucket full of water
*Using your nylon brush, dip it into the bucket and lightly scrub down the entire wicker piece, working on molded/dirty areas
*Hose off the wicker piece well with water
*Allow to fully dry - 24 to 48 hours
*Apply first coat of Zinsser Bin Primer
*Allow to dry 30 minutes
*Apply second coat of Zinsser Bin Primer
*Allow to fully cure 24 hours
*Apply first coat of Painter's Touch 2X (COLOR TO BE DETERMINED)
*Allow to dry 30 minutes but not more then 60
*Apply second coat of Painter's Touch 2X (COLOR TO BE DETERMINED)
*Allow to fully dry 48 hours before full use

Thursday, March 8, 2012

Antique Sewing Box Planter


Nothing says Springtime like a planter full of violet colored pansies! I came upon this sewing table at my local Good Will last winter and have been anxious for it to make a "Welcome Spring" statement on my front porch. I love the oval shape, drawers and decided that Painter's Touch Ultra Cover 2X in Gloss Sun Yellow - added those violet pansies and WOW - what a great splash of color! I wanted to also share the piece primed with Painter's Touch Ultra Cover 2X White Primer.

Project Materials
*Unique Planter
*Drop Cloth
*320 Grit Sandpaper
*Paint Thinner
*Clean Lint Free Cloth
*Planting Soil
*Potted Pansey Plant

Project Steps
*Lightly sand down planter
*Wipe off with Paint Thinner and Lint Free Cloth
*Allow to dry 30 minutes
*Apply Painter's Touch 2X Primer
*Allow to dry 30 minutes
*Apply First Coat of Painter's Touch in Gloss Sun Yellow
*Allow to dry 30 minutes
*Apply Second Coat within one hour or after 48 hours
*Allow to dry 48 hours and then fill with soil & plants, place pansey plant on top

Monday, February 20, 2012

Sanding Tips 101

Sanding to stain is like primer is to paint. If you do a great job at sanding no one notices, BUT if your sanding jobn is minimal and weak - they will notice! No finish will hide a bad sanding job - same applies for prep and primer work prior to applying paint on the wall.

*Always do your sanding in a well lit area - it is easier to see scratches, nicks, dents or glue marks.

*Don't press too hard while sanding, keep even pressure if using a sanding tool. You do not want to dent into the wood from too much pressure.

*Sanding is not only a one step process. Sand out all blemishes which is any deep scratches, nicks or dents. Use a course grit such as 120-150 for the first layer of sanding.

*Sand in layers and sand with the grain of the wood. Change your paper often-be it on your tool or hand. The sanding does wear out and you will have uneven areas if you do not change papers often. Work your way up in sandpaper - ending with 320 grit.

*Your final sanding should be with the 320 - be sure to sand all of the parts with each sandpaper - including back ledges, legs and corners. You can wrap the sandpaper around the edge of a putty knife to fit into the back of a ledge on a table or dresser.

Tuesday, December 27, 2011

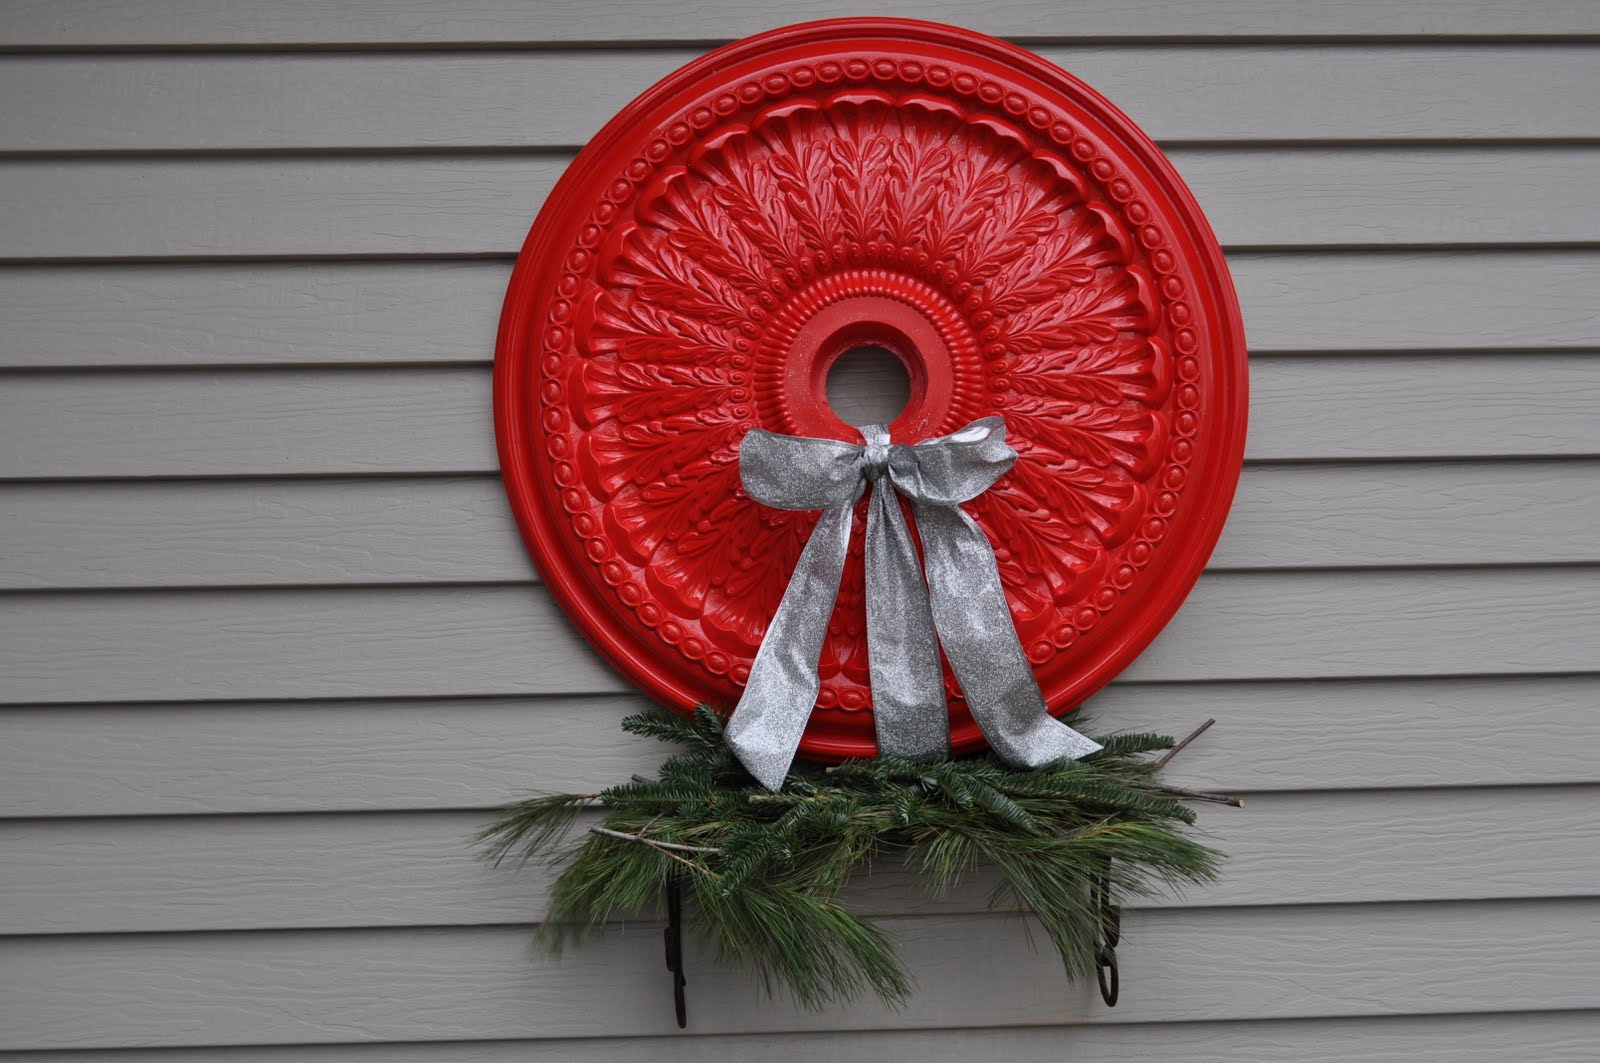
Thrift Store Score - Cherry Red Medallion Wreath

This is my "Thrift Store Score" for the month. I grabbed this builder's ceiling medallion for $4 at my local Good Will! I was looking to make a bold statement and went with Rust-Oleum's Stops Rust in Cherry. Even though the medallion is not metal, I was determined to use the Cherry color - it worked and wow is it stunning!


Project Steps
1. Wipe off medallion with paint thinner - this one had lots of dirt in the crevices
2. Wipe off with a clean rag
3. Spray with Zinsser BIN Primer
4. Allow to fully dry one hour
5. Apply two to three light coats of Rust-Oleum's Stops Rust in Cherry
**Quick Tip - Be sure to allow at least 35 to 40 minutes in between coats - I even applied one coat and after 48 hours went back and applied the final two
6. Once fully dry - about 24 hours tie on decorative ribbon

Project Materials
- Decorative Ceiling Medallion (mine was 52")
- Zinsser BIN Primer
- Rust-Oleum's Stops Rust in CHERRY
- Decorative Ribbon
- Paint Thinner